Hamburger Button Animation
Last week I wrote about Google's Authentic Motion. The post was kind of dry, though, so I decided to use the derived timing function to implement one of Android's new animations. A hamburger button transition seems to be fitting iOS design language1 and that's what I've chosen to recreate. It may become a good alternative to another recently introduced transition.
Initial Setup
After watching the above video in slow-motion a couple of times, we can notice that the following animations take place:
- Top segment rotates by 5/4 π radians, its length shortens and its position changes.
- Middle segment rotates by π radians and shortens slightly.
- Bottom segment rotates by 3/4 π radians, its length shortens and its position changes.
We'll represent each segment as a CAShapeLayer. At the same time we'll declare some necessary metrics:
class HamburgerButton: UIButton {
    let top: CAShapeLayer = CAShapeLayer()
    let middle: CAShapeLayer = CAShapeLayer()
    let bottom: CAShapeLayer = CAShapeLayer()

    let width: CGFloat = 18
    let height: CGFloat = 16
    let topYPosition: CGFloat = 2
    let middleYPosition: CGFloat = 7
    let bottomYPosition: CGFloat = 12
}
Each layer's path will be simply a straight line and all layers will be styled in the same way:
let path = UIBezierPath()
path.moveToPoint(CGPoint(x: 0, y: 0))
path.addLineToPoint(CGPoint(x: width, y: 0))
shapeLayer.path = path.CGPath

shapeLayer.lineWidth = 2
shapeLayer.strokeColor = UIColor.whiteColor().CGColor
CAShapeLayer doesn't derive its bounds from the underlying path, so we have to set it by hand. We'll also disable implicit animations for transform and position keys:
let strokingPath = CGPathCreateCopyByStrokingPath(shapeLayer.path, nil, shapeLayer.lineWidth, kCGLineCapButt, kCGLineJoinMiter, shapeLayer.miterLimit)
shapeLayer.bounds = CGPathGetPathBoundingBox(strokingPath)

shapeLayer.actions = [
    "transform": NSNull(),
    "position": NSNull()
]
What's left is setting up initial positions:
let widthMiddle = width / 2
top.position = CGPoint(x: widthMiddle, y: topYPosition)
middle.position = CGPoint(x: widthMiddle, y: middleYPosition)
bottom.position = CGPoint(x: widthMiddle, y: bottomYPosition)
Animations
All the animations happen simultaneously, have the same durations and timing functions, so we can simply wrap them in a CATransaction, as follows:
CATransaction.begin()
CATransaction.setAnimationDuration(0.4)
CATransaction.setAnimationTimingFunction(CAMediaTimingFunction(controlPoints: 0.4, 0.0, 0.2, 1.0))

// animations will go in here

CATransaction.commit()
Middle Segment's Animation
We'll start with the middle segment's animation, because it's the most straightforward one. We'll rotate it and change its strokeEnd value. We don't have to create a CABasicAnimation instance to animate strokeEnd, because it's going to be animated implicitly:
let middleRotation = CAKeyframeAnimation(keyPath: "transform")
middleRotation.values = rotationValuesFromTransform(middle.transform,
    endValue: showsMenu ? CGFloat(-M_PI) : CGFloat(M_PI))
middle.ahk_applyKeyframeValuesAnimation(middleRotation)

middle.strokeEnd = showsMenu ? 1.0 : 0.85
To keep the core animation code concise, we'll extract four reusable methods and functions (you can see them on GitHub):
ahk_applyKeyframeValuesAnimation:andahk_applyKeyframePathAnimation:endValue:simply add the animation to the layer and set the model's value properly.rotationValuesFromTransformtakes atransformandendValue, and returns an array with four rotation transforms2, two of which have values interpolated linearly between0andendValue.quadBezierCurveFromPointreturns aUIBezierPathconsisting of one quadratic curve.
Top Segment's Animation
Now, we're ready to tackle top's animation. We'll use pretty much the same code as above to rotate it and change its strokeStart value:
let topRotation = CAKeyframeAnimation(keyPath: "transform")
topRotation.values = rotationValuesFromTransform(top.transform,
    endValue: showsMenu ? CGFloat(-M_PI - M_PI_4) : CGFloat(M_PI + M_PI_4))
top.ahk_applyKeyframeValuesAnimation(topRotation)

top.strokeStart = showsMenu ? 0.0 : 0.3
Here's what we'll get if we also move top to the bottom in a straight line:
The first and the last frames look fine, but the transition is incorrect. It's easy to notice that top's position in the original animation doesn't change along a straight line, but along a curve. After analyzing the original animation frame by frame we notice that it moves along a quadratic Bézier curve. We'll use CAKeyframeAnimation's path property to animate top's position accordingly:
let positionPathControlPointY = bottomYPosition / 2
let verticalOffsetInRotatedState: CGFloat = 0.75
let topPositionEndPoint = CGPoint(x: width / 2, y: showsMenu ? topYPosition : bottomYPosition + verticalOffsetInRotatedState)

let topPosition = CAKeyframeAnimation(keyPath: "position")
topPosition.path = quadBezierCurveFromPoint(top.position,
    toPoint: topPositionEndPoint,
    controlPoint: CGPoint(x: width, y: positionPathControlPointY)).CGPath
top.ahk_applyKeyframePathAnimation(topPosition, endValue: NSValue(CGPoint: topPositionEndPoint))
We could now analogously animate bottom, but I'm going to skip that part here.
Details
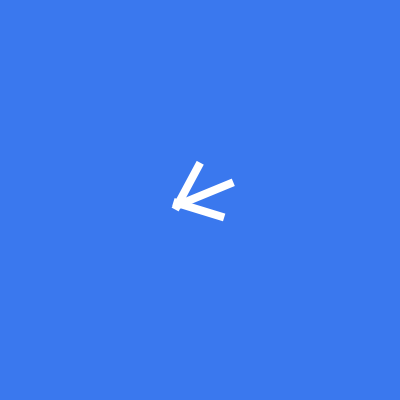
Everything looks great, except for the one thing — close to the animation's end, segments don't form the arrow's tip nicely:

To fix that we can slightly adjust rotation's timing via keyTimes property:
topRotation.calculationMode = kCAAnimationCubic
topRotation.keyTimes = [0.0, 0.33, 0.73, 1.0]
With this change in place our animation is finally production-ready:
You can see the whole project on GitHub. Let me know on Twitter or by email if you have any questions or suggestions.
Disclaimer: Some parts of the implementation have been inspired by, previously mentioned, Robert Böhnke's post.
-
On the other hand, session 211 from 2014's WWDC sports a nice explanation of why you should not use hamburger menus at all. ↩
-
I initially used three values, but later on changed it to four, because I needed to adjust
keyTimeswith more granularity. ↩
